Flashing & First Setup
Getting firmware onto a fresh device, and walking through the setup wizard. Budget about 20 minutes.
First flash - the web flasher
The very first flash has to happen over USB. It works in any Chrome-based browser (Chrome, Edge, Brave), with nothing to install.
- Connect the WT32-SC01 Plus to your computer with a USB-C cable
- Open niko11111.github.io/SpoolmanScale
- Click the button on the page and pick the serial port of your device
- Choose Install. A scale that already runs SpoolmanScale is offered Update instead, which keeps WiFi, calibration and backend settings
- Wait about 2 minutes
- The browser offers to set up your WiFi. Enter it now, or skip it and do it on the scale in step 2
It has to be a data cable
Many USB-C cables carry power only. If no serial port shows up, that is the first thing to swap.
Chrome, not Firefox
The flasher uses the WebSerial API. Firefox does not implement it.
Keeping your settings
If the flasher offers Install on a scale that already has your settings and asks whether to erase the device, leave that box unticked. Tick it only if you want a clean start.
Changing the WiFi later
The flasher page also changes the WiFi of a scale that is already installed. Connect it by USB, open the page, click the button, pick the port and choose Change Wi-Fi. Nothing gets flashed.
Every later update runs on the device itself or from your browser over the network. See Updating the firmware - you will not need the cable again.
Step 1 - Language and time zone
English, Deutsch or Français, and below it your time zone, so the clock is right from the first boot. The zone follows the language until you pick one yourself. Next saves both and restarts the device once.
Both can be changed later under Settings → System → Sprache / Language.
Step 2 - WiFi
If you already entered your WiFi in the web flasher, the scale shows Already connected to WiFi. with the network, its IP and the signal. Tap Next, or Change WiFi to pick a different one.
Otherwise there are two ways, and with the second one the password is never typed on the scale.
- The list of networks fills by itself; the button at the top scans again
- Tap your network
- Type the password.
1#switches to digits and special characters, including^ ~ |and` - Confirm with ✓ or ↵
- Tap Set up by phone below the list
- The scale opens a WiFi network of its own and shows two QR codes. Scan the left one to join; the password is new every time and only on the display
- The setup page usually opens by itself. If not, scan the right QR code
or open
http://10.42.0.1/ - Pick your network, or type the name of a hidden one, enter the password and tap Connect
- The scale closes its own network, connects and shows the result on its display
The phone says the network has no internet
That is right, it is the scale's own network. Stay connected, otherwise some phones switch to mobile data and the page does not load.
2.4 GHz only
The ESP32-S3 has no 5 GHz radio. A 5 GHz network will not appear in the scan at all, which looks like the network is missing rather than unsupported.
Step 3 - Pick a backend
SpoolmanScale talks to three filament managers. Pick one now, change it any time under Settings → Connection or from the web interface - your entries for the others are kept.
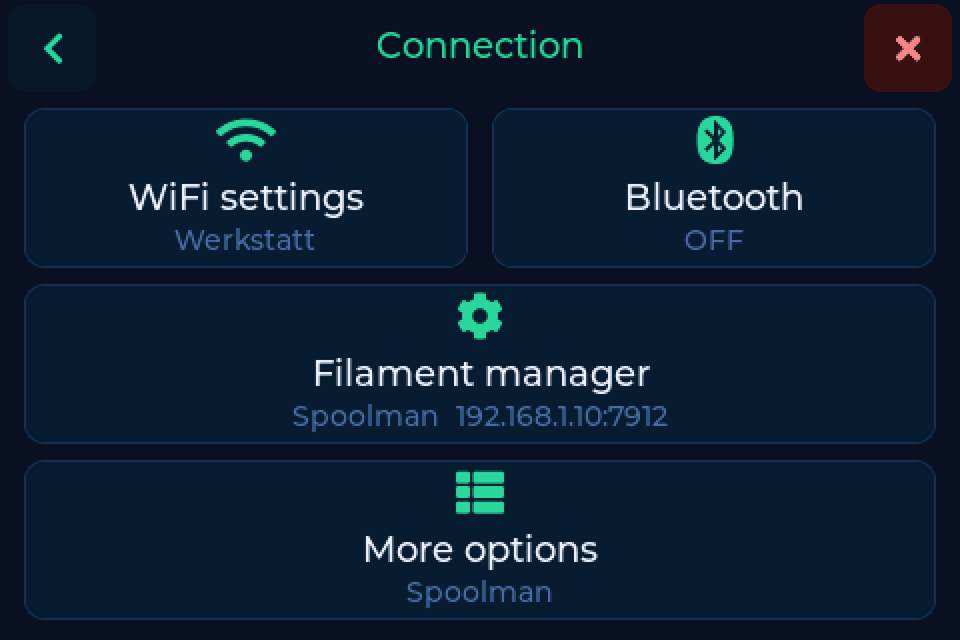
Address and port, nothing else. There are no credentials to enter.
| Field | Example |
|---|---|
| Host | 192.168.1.100 |
| Port | 7912 |
FilaMan needs two credentials, and it creates them in two different places. Enter the host and test the connection first. Once the test passes, Next shows an address: open it in a browser on your computer, and the credentials go into the Credentials card of the Backend page. Later you get back there under Settings → Connection → Set up in browser.
| Field | Example / where it comes from |
|---|---|
| Host | 192.168.1.100:8083 |
| API key | FilaMan: gear icon → API Keys |
| Device code | FilaMan: Admin Panel → Devices |
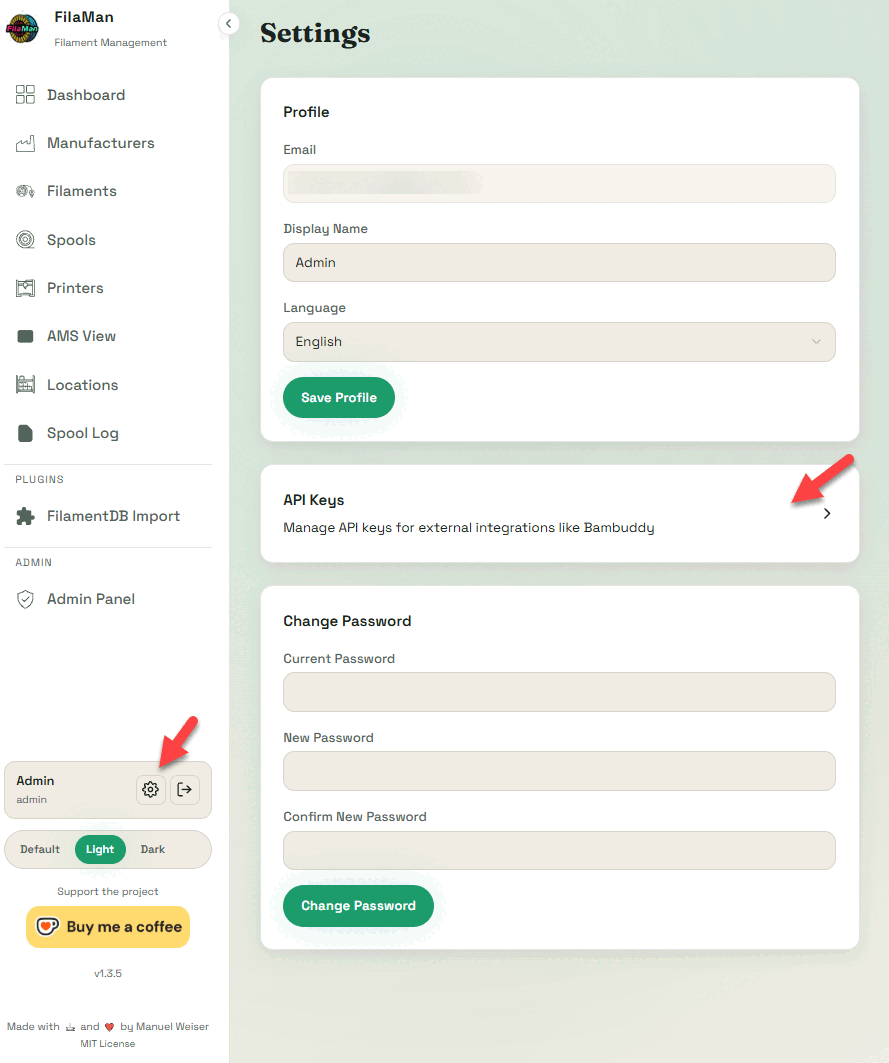
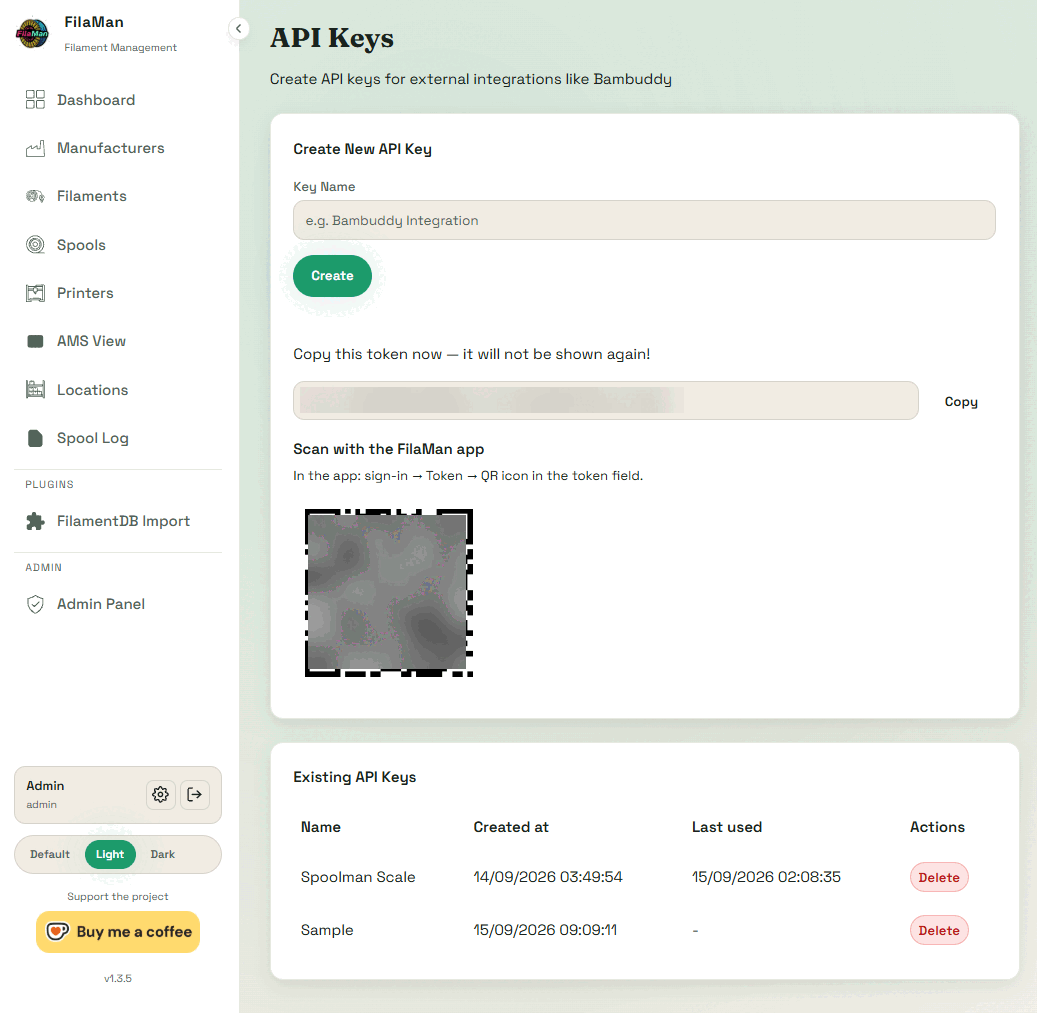
1. API key. In FilaMan, click the gear icon next to your user name
at the bottom of the sidebar, open API Keys and create a key, named
SpoolmanScale for example. Enter it under API key and press Save.
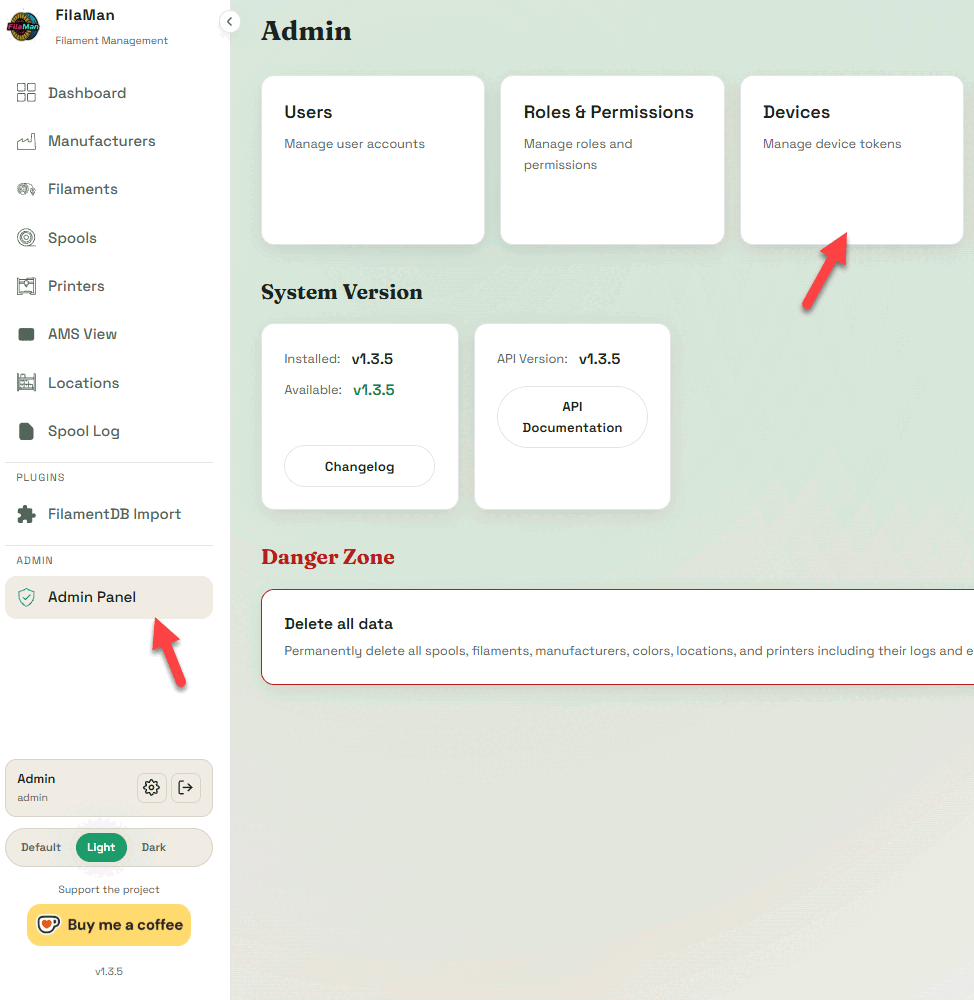
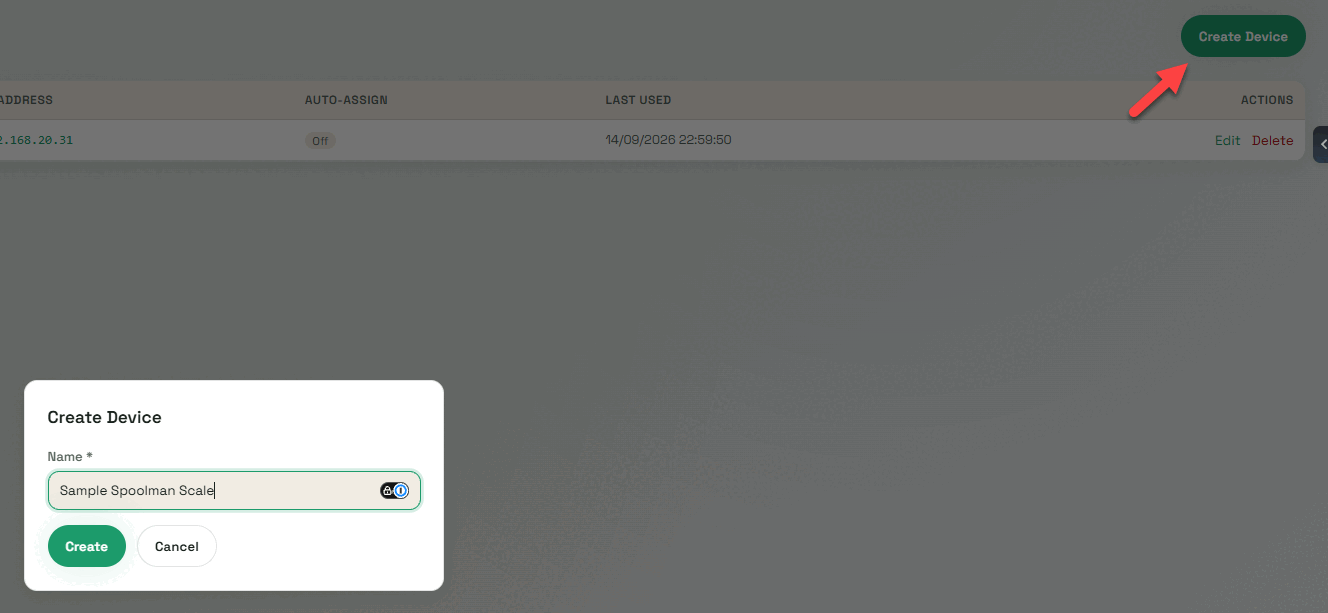
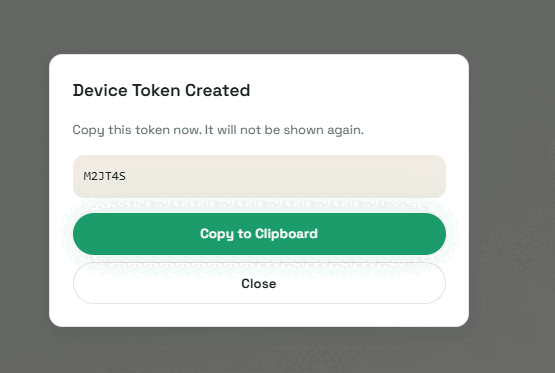
2. Device code. In FilaMan, open Admin Panel → Devices and click Create Device. FilaMan shows a 6 character code of digits and capital letters. The dialog is titled Device Token Created, but what it shows is the code, not the token. Enter it under Device code and press Register. The scale trades the code for a device token, and the code is used up.
Both are shown only once
Copy the key and the code the moment FilaMan shows them. If one gets lost, create a new one.
Use an admin account for both
Only an admin can create a device. An API key has the rights of the account that created it, so create the key with the admin account as well, or FilaMan refuses the AMS assignment.
A single API key, sent as X-API-Key. Create it in BamBuddy under
Settings → API Keys with Read Status and Manage Inventory.
The key is optional: a BamBuddy instance with authentication switched off answers without one.
With authentication switched on, the connection test says API key still missing until you have entered it. That is expected, and the setup carries on to the step where the key goes in.
| Field | Example |
|---|---|
| Host | 192.168.1.100:8000 |
| API key | optional |
Tap Test connection before moving on.
Where the tag UID is stored
Spoolman only
FilaMan and BamBuddy keep tag identifiers themselves. This does not apply to them.
There is no setup step for this any more. After the connection test, Next goes straight on to calibration.
With Spoolman 0.27 or newer the scale stores tags natively in Spoolman
(Spoolman NFC (native)). A new setup picks this by itself on the first
scan, and a scale that was on extra.tag moves over once by itself. The old
field stays filled. On an older Spoolman the UID goes into an extra field:
| Field | Use it when |
|---|---|
tag |
Nothing else reads your tags. The default before Spoolman 0.27. |
nfc_id |
Another tool in your setup already uses this name |
card_uids |
You want several tags on one spool |
Missing fields, such as the tag field or last_dried for the drying date,
are created by the scale on the first write. To change the choice later, go to
Settings → Connection → More options → Spoolman Extra Fields → Tag field.
The UID is written as plain hex (04B9E542447080), the same way every other
tool around Spoolman writes it. Spools linked by an older firmware, which used
colons, are still found and get rewritten once on their first scan.
Step 4 - Calibrate
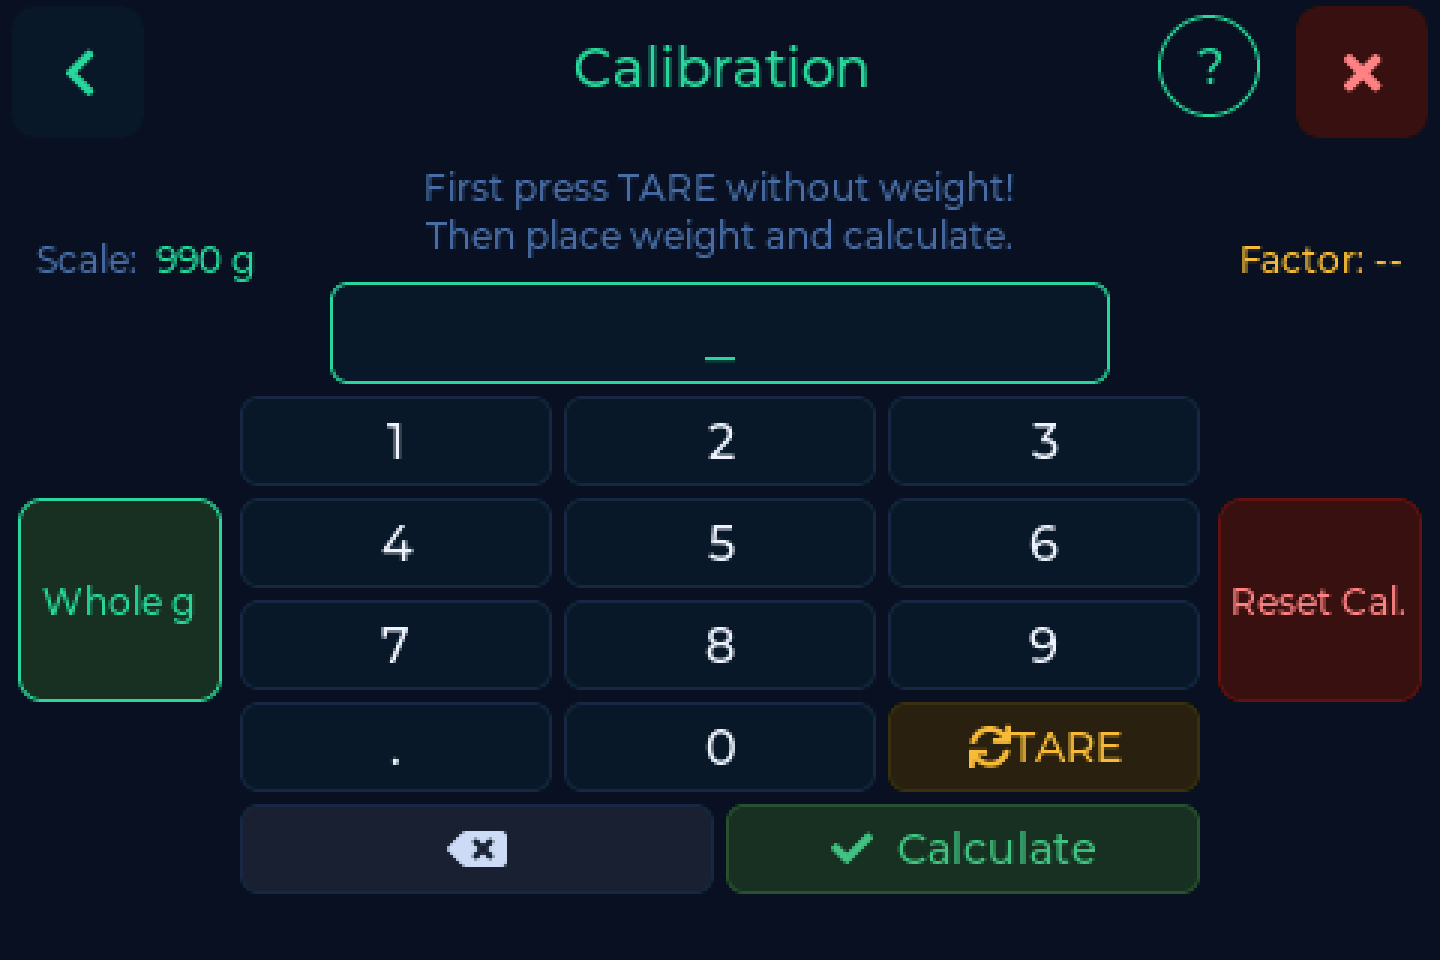
A scale that has never been calibrated shows the converter's raw value, not grams - a six digit number that drifts by hundreds on its own. That is expected on a new build, and the scale says so in the status bar.
At the end of the setup the scale asks about it: Calibrate now opens the calibration straight away, Got it! leaves it for later.
- Settings → Scale → Calibration
- Clear the platform, tap TARE, wait for 0
- Put on a weight you know precisely, ideally around 1000 g
- Type that weight in grams
- Tap Calculate. The factor is saved right away
The reference weight sets the ceiling
A full spool checked on a kitchen scale is plenty. Whatever error is in your reference weight is baked into every measurement afterwards.
Details and the finer points in Weighing & calibration.
No load cell fitted
A device built without a load cell skips this. Turn off Settings → Scale → Scale fitted and restart: the device then works as a tag terminal. Weights leave the screen, the weight button becomes Location, and calibration and bag weight leave the menu.
Done
You land on the main screen. Put a spool on it and the display wakes up by itself.